In a previous article, I mentioned that I completed a new chicken coop for our birds. Here’s an overview of that. I’m not writing this as an instructional post. It is informational for someone who may be planning a coop build.
Designing the Coop
A chicken coop really has very few requirements. It must be large enough to house all the birds comfortably and out of the weather. It also needs to be secure enough to keep your local predators out. That’s really it. Everything else is either for aesthetic or convenience reasons. Although, some convenient design features might also be deemed essential.
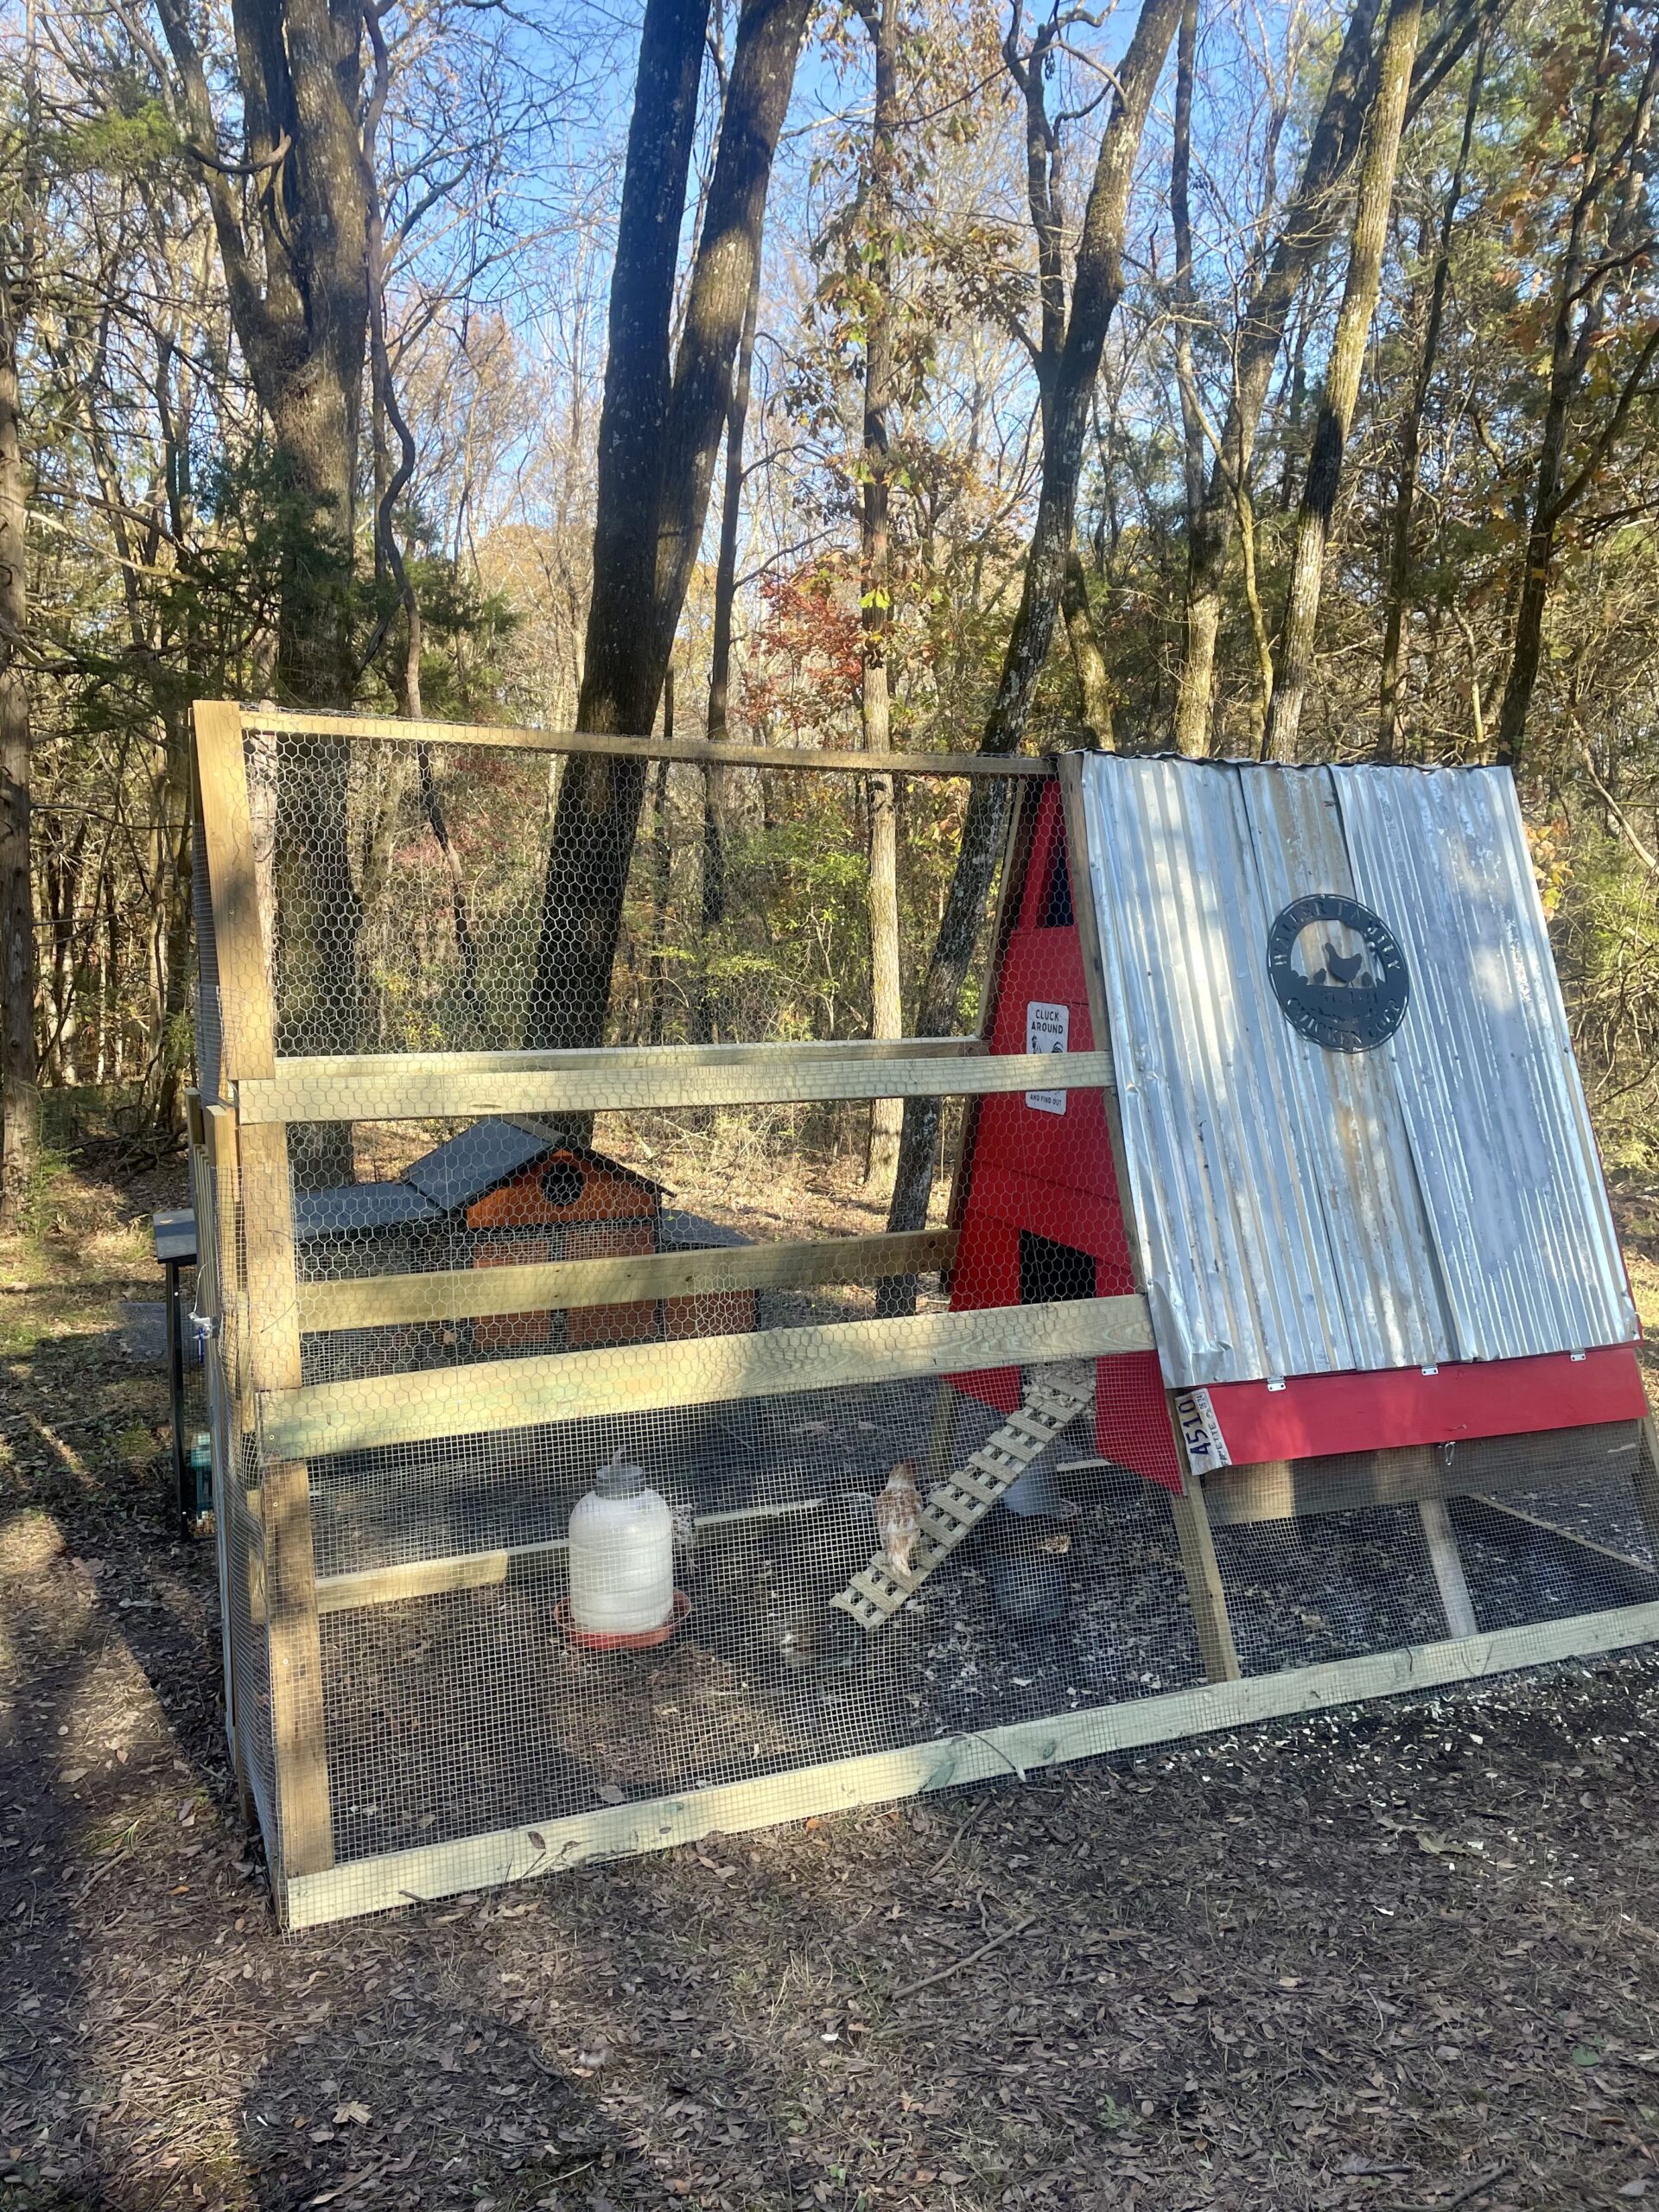
I went with an A-frame design for a couple reasons. Number one was that it seemed more resource efficient. I was working with mostly scrap lumber. Eliminating one side seemed like a good way to stretch resources.
The second reason for the A-frame is that it just looks good to me. Not everything has to have a practical reason behind it. There are a million ideas for coops out there. Truthfully, most are no better or worse than the next.
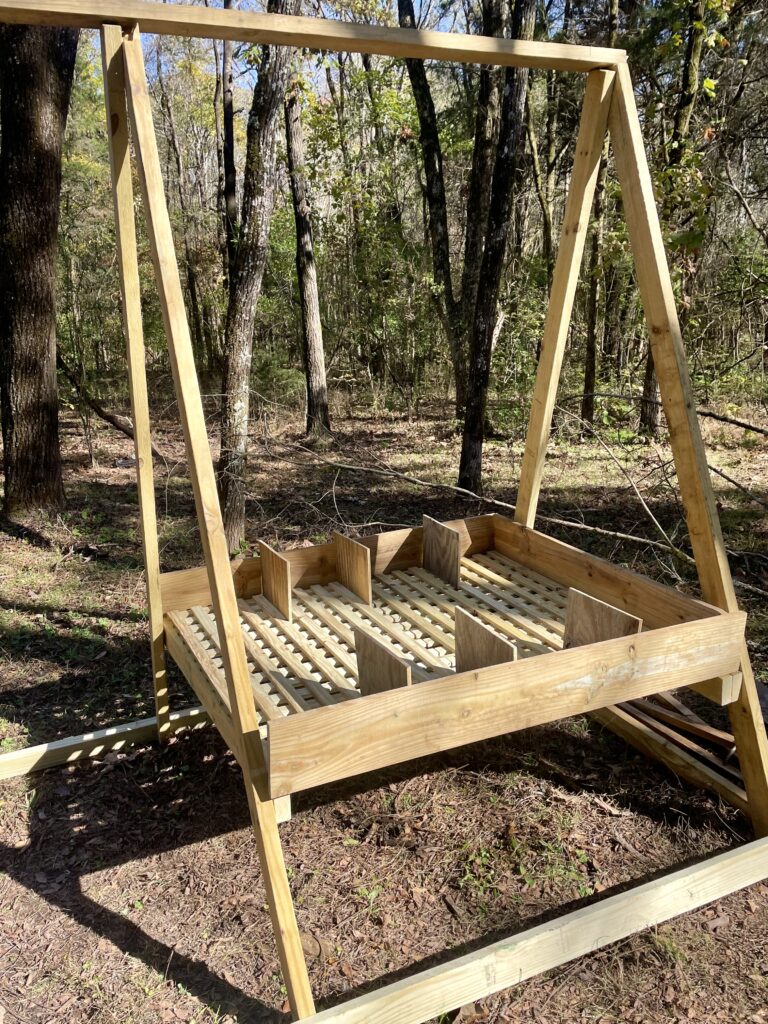
The shelter portion is raised off the ground. This way, the eggs are easier to get to and hopefully out of reach of predators. It has eight partitioned nesting boxes. General rule is one box for every two or three hens. When not laying, they huddle together anyway. There is also a roost stick running down the middle above the boxes.
If you don’t free-range, you’ll need a run for the birds to get outside and scratch around. We eventually plan to semi-free-range when we get around to fencing in a larger area. The run portion extends under the coop to make use of that space and provides a sheltered area outside.
Coop Construction
I mainly used pressure-treated scrap lumber for this project. The frame of the structure is 2x4s with additional lathe running horizontal to fasten the tin and wire to. The final product turned out very strong and stabilized itself as I built. I highly recommend measuring and cutting lengths and especially angles carefully. Otherwise, you’ll really test your problem solving skills.
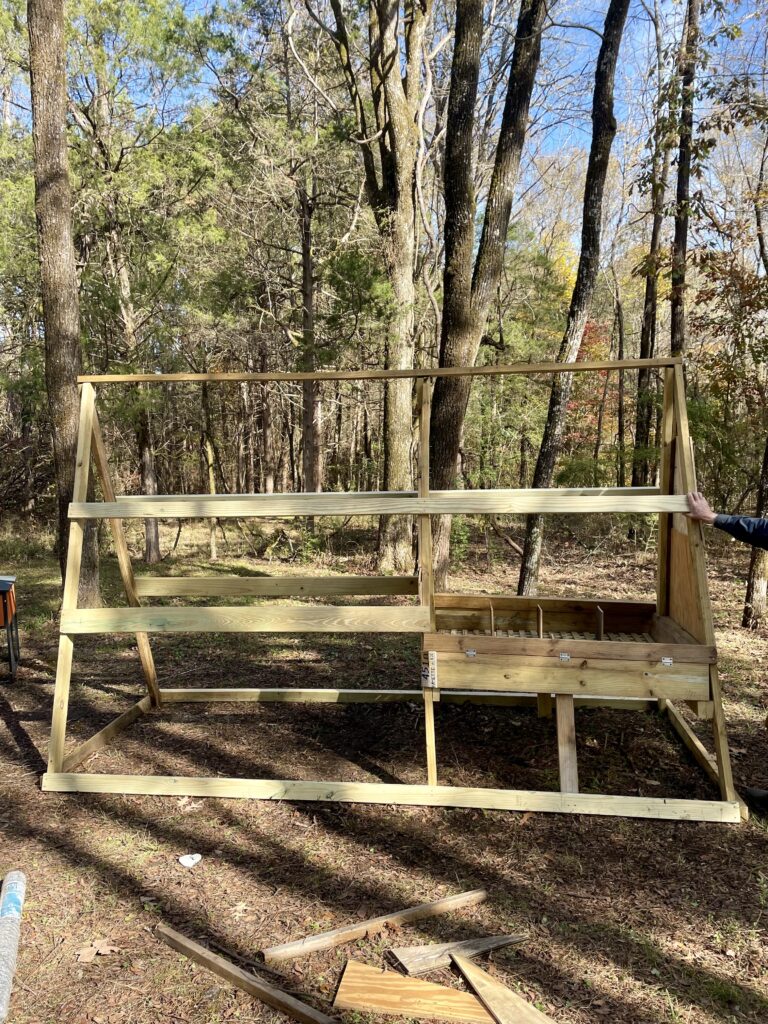
I used a heavy lattice material left over from building a porch onto my parents’ house for the floor. This help hold down feces buildup. Straw bedding does a decent job of staying in there, however. Keeping this space in the frame square and even is crucial to having a level floor and minimizing gaps.
In the above picture, you’ll notice I overlapped the uprights. I recommend against this as it skews the space and complicates building the walls and floor.
Features
I used the same lattice to build a door to access the run in order to refill food, water, and bedding. There are also access doors on either side to get eggs from the outside. Coops require some level of ventilation and walling in the A-frame created natural vents in the eaves. The bottom portion is wired in with 1/4” hardware mesh while the upper uses standard chicken wire. The hardware cloth is stronger and better able to hold up against predators. Fence staples secure the meshes to the frame.
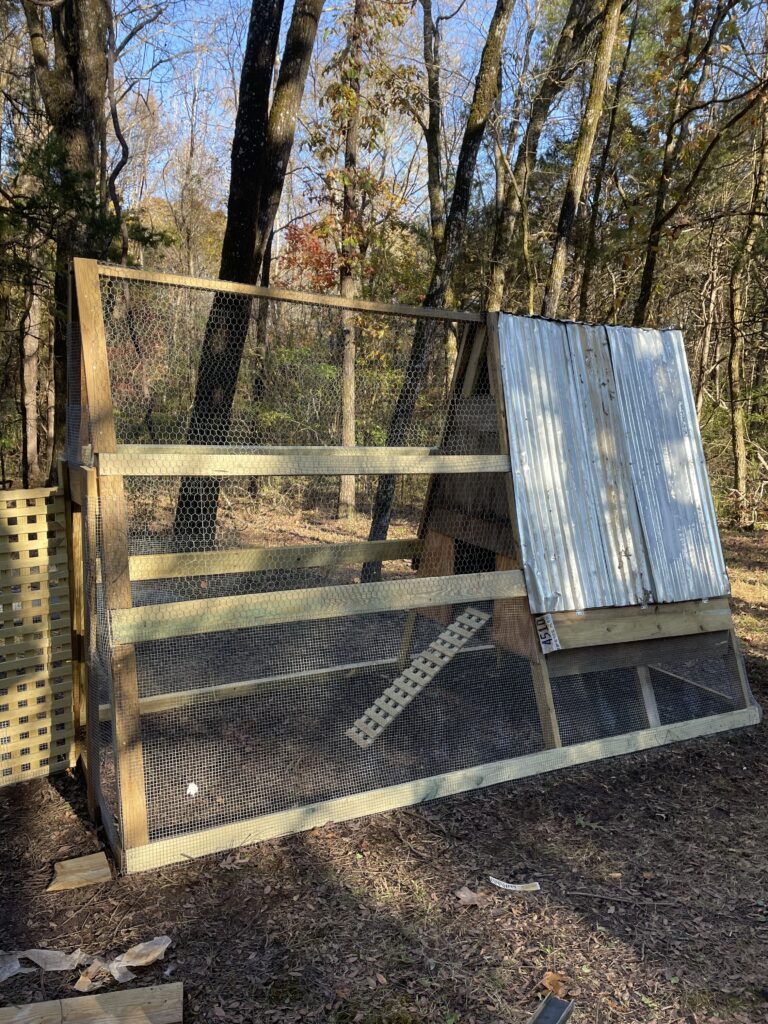
Tin and plywood close in the shelter. I then primed and painted the untreated walls with exterior weatherguard type products. Lastly, all of the doors are secured with either a gate latch or a hasp and locked with a carabiner.
Things To Improve
Future improvements are needed for this coop to increase security and convenience. First is strengthening the door where the latch attaches. Next, I also need to shore up some of the smaller gaps before the snakes become active again. A back door to the coop would make it easier to clean and change bedding.
So far, this coop is providing a great shelter for our chickens and was a fun project. It has already sheltered them during several days of below freezing temps and snow.
