Why A Skull Mount?
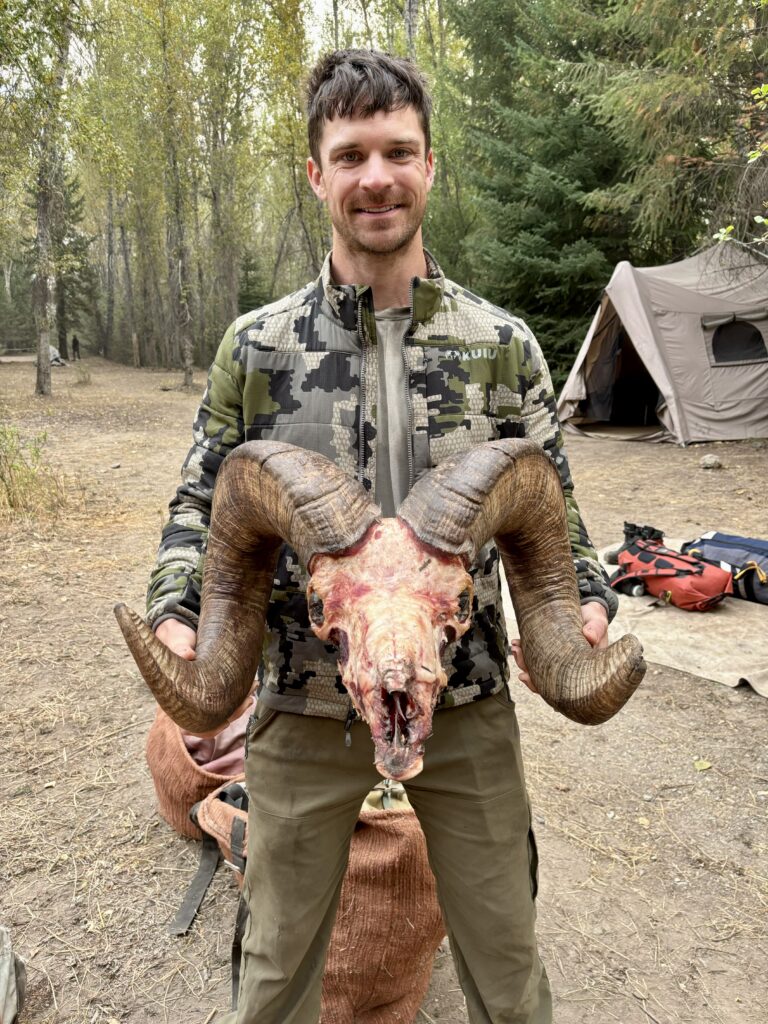
Bighorn sheep are the embodiment of the Rocky Mountain West. Considering how difficult they are to obtain, from tags to preparation to hunting, memorializing the hunt is a big decision. I’m not big into shoulder mounts anyway and sheep skulls are badass. Plus, skull mounts are easier to maintain, take up much less space, and are cheaper (I did this one for less than $100). Finally, a skull mount is easy to do yourself. Going through that process allows you to be even more involved in your hunt. However, sheep have some key physical differences compared to cervids that you really need to pay attention to if you want a successful skull mount. Here’s how I did it.
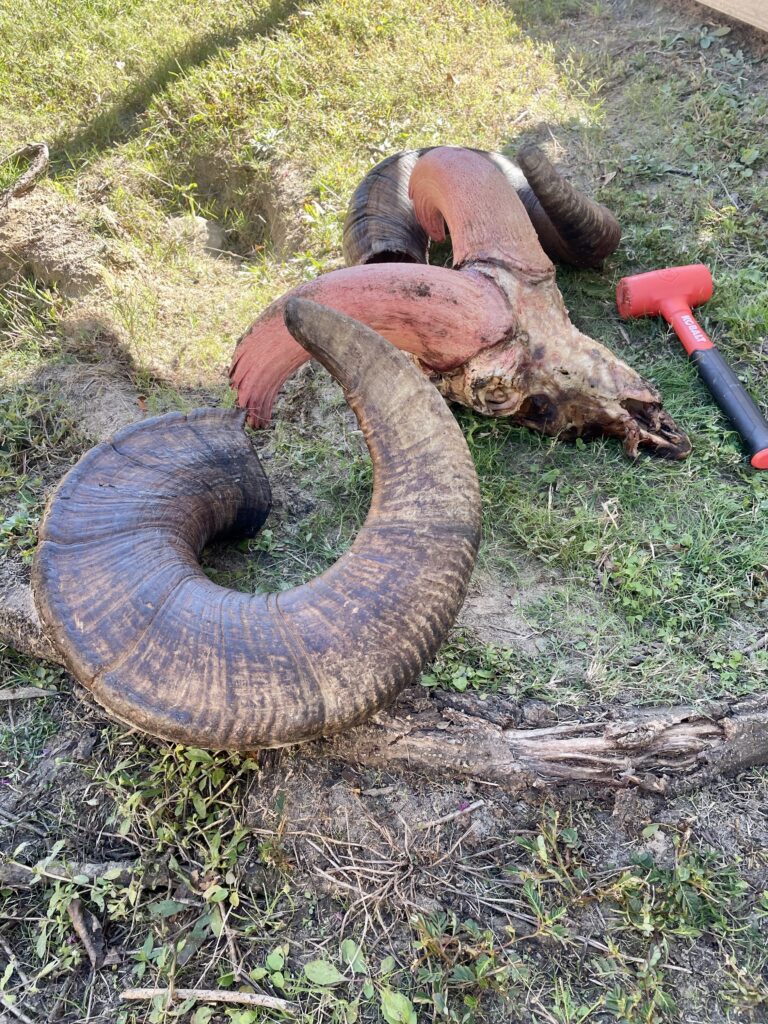
Step One: Remove The Horn Sheaths
Unlike deer, which grow antlers of bone directly from pedicles on their skull, sheep have bony cores encased in keratin. Whatever your process in the following steps, those sheaths won’t stand up to it. Boiling will disintegrate them and beetles will eat them. They have to come off and the only way to do that is time. They have to rot off.
I started by double wrapping the whole head in contractor bags and placing it in a bin outside. I wanted to minimize bugs but, undoubtedly, there will already be some fly eggs from the field. Therefore, there will be maggots though they didn’t harm anything.
I left the head packaged in my yard for approximately one month. At this point, it is really ripe. Forewarning, this is where it gets gross. I removed it from the bags and used a dead-blow hammer to give it a few healthy smacks. If properly rotted, this should be enough to loosen the sheath from the core. Push down on the nose while simultaneously pulling on the horn from behind. Go ahead and cut off the last few inches of the cores. You’ll never get the horns back on properly otherwise.
Step Two: Rot The Skull Some More
After removing the sheaths, you can go several different routes. If you have access to beetles, you can let them do the work. You can also start boiling (simmering, actually) immediately. I didn’t want to buy beetles or pay a taxidermist for theirs and boiling increases the risk of overcooking the skull and making the smaller, delicate bones brittle. I went with option three: maceration. Put simply, rotting the flesh off in water. The skull should stay completely submerged for another 6-8 weeks although it may be shorter in warmer temps.
Step Three: Prep The Horns
Take this time to prep the horns. They will have residual blood, moisture, and connective tissue inside that needs to come out. The back of a filet knife makes a nice flexible scraper. I would just be cautious to use anything too crazy abrasive like scouring pads. You certainly don’t want to use those on the outside as you will end up removing the natural colors of the horn.
I then soaked the horns for a day in water and dish detergent and lightly scrubbed the outside. After they are nice and clean, pour borax down the inside to soak up moisture. After a day or two, pour out the borax. Some will be left behind in clumps. Knock it loose. Something flexible like a bottle brush is also handy. Add some more borax and repeat for good measure.
Step Four: Removing Flesh
I’ve seen videos of pressure washers used for this step but I wasn’t that brave. A regular water hose with a high pressure nozzle did work for flushing out the brain and most of the internal tissue. Probably 90% of the external tissue either sloughed off in the bucket or easily pulled off.
Even after macerating, there was still some stubborn flesh and grease along with something called grave fat, also called adipocere. Subsequent reading revealed these chalky looking, waxy deposits are caused by a lack of oxygen while flesh rots. Out came the turkey fryer.
I simmered the skull VERY gently with a squirt of dish detergent in the largest pot I could get my hands on. I would take it out, scrub it with a toothbrush, and repeat. The adipocere only shows when the bone dries. It took a few rounds to get it all. Elbow grease seems to be the only way to get rid of it. This step is also the key to getting a truly white skull that won’t yellow with time. That yellowing is grease inside the bone coming to the surface. At this point, the skull is completely clean. Keep track of any teeth that fall out in either the maceration bucket or the simmering pot.

*Note: If you plan on having your sheep scored, the mandatory drying period resets if you submerge the skull in any liquid.
Step Five: Whitening
The go to tool here for the home taxidermist is usually hydrogen peroxide. You can acquire highly concentrated bottles at beauty supply stores but the regular stuff at the pharmacy has always worked for me.
One thing I do differently from a lot of people is I don’t submerge my skulls in peroxide. It just seems like a waste and I never seem to buy enough. Instead, I wrap the skull completely with paper towels soaked in the stuff.
If you did a good job of completely degreasing the skull, then this should only take a day or two at most.
Step Six: Finishing Your Skull Mount
Congratulations! You’ve done the hard parts. Now all that’s left is to glue the horns back onto the cores. I’ve read Bondo works pretty well but I just used wood glue. Make sure the horns are as close to the base as possible. Prop the skull against a door nose up with something against it to prevent rolling while the glue sets. You can now glue in any teeth that fell out or are loose.
I still had some off smells, especially in the horns, that I could not get rid of. Not rotten smelling but more barnyard. I found the remedy to this was leaving the finished head outside in the sun for a day or two. This neutralized that last bit of smell. Even my wife couldn’t detect it and she could smell the skull across the room even after it was completely devoid of flesh.
You’re done if you want or have a stand ready to go. I wanted to do something a little different.
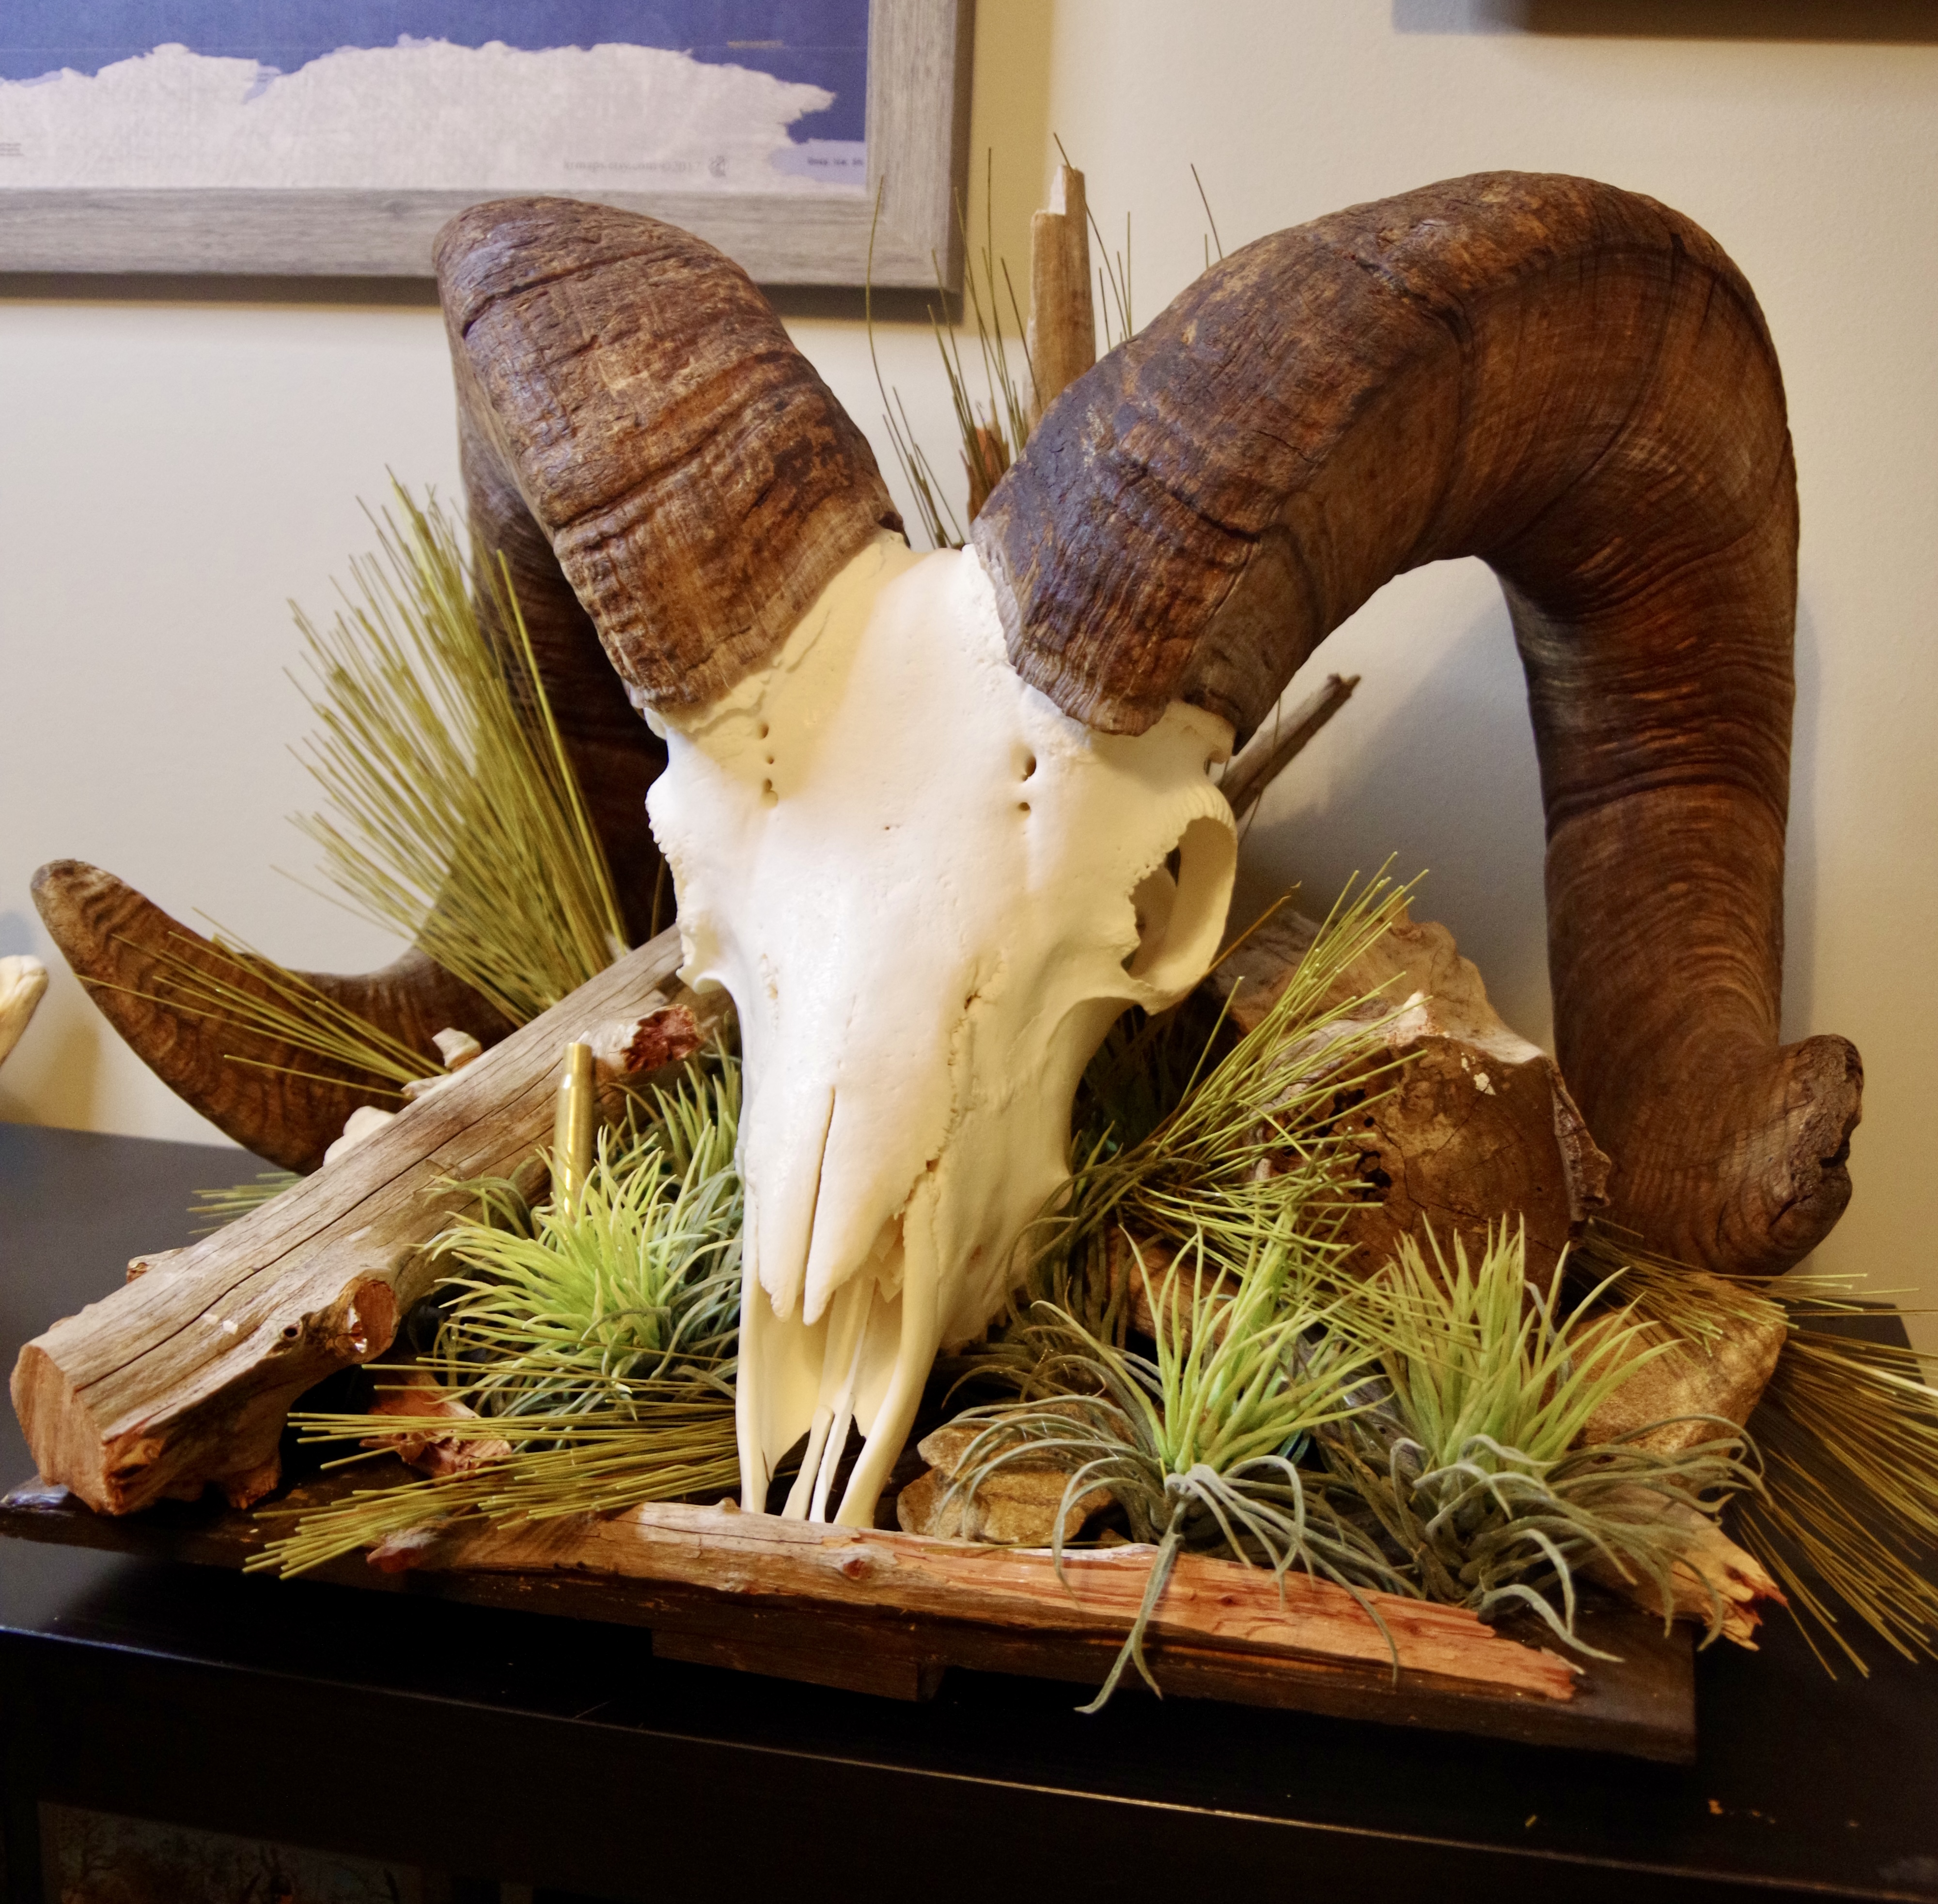
DIY Habitat Piece
I wanted to do a set piece with habitat features reminiscent of the Frank Church. This hunt was as much about the country as it was about the animal and I wanted to showcase that.
One constant in those mountains is deadfall and a lot of it is fir. We don’t have fir around here but I found several dead cedars that closely resembled it. I went around and found samples of different sizes that were long dead but off the ground so that they were weathered grey and dry. I constructed a few different compositions until I had the angles I wanted.
My base is a piece of plywood with modeling clay in strategic places to both give some texture and support the wooden pieces. I glued the clay down and painted over the whole base. Using light and dark earth tones and counter shading, I tried to create the effect of dirt and rock through whatever holes appeared in the final product. Lighter colors on the flat surfaces, darker on the raised.
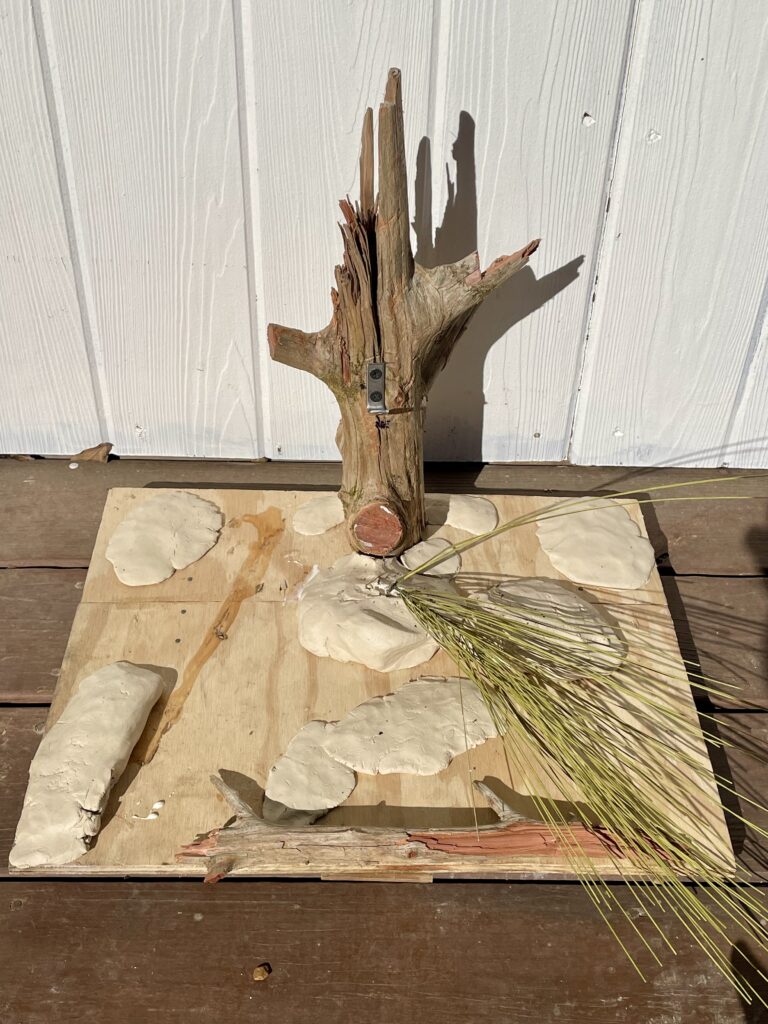
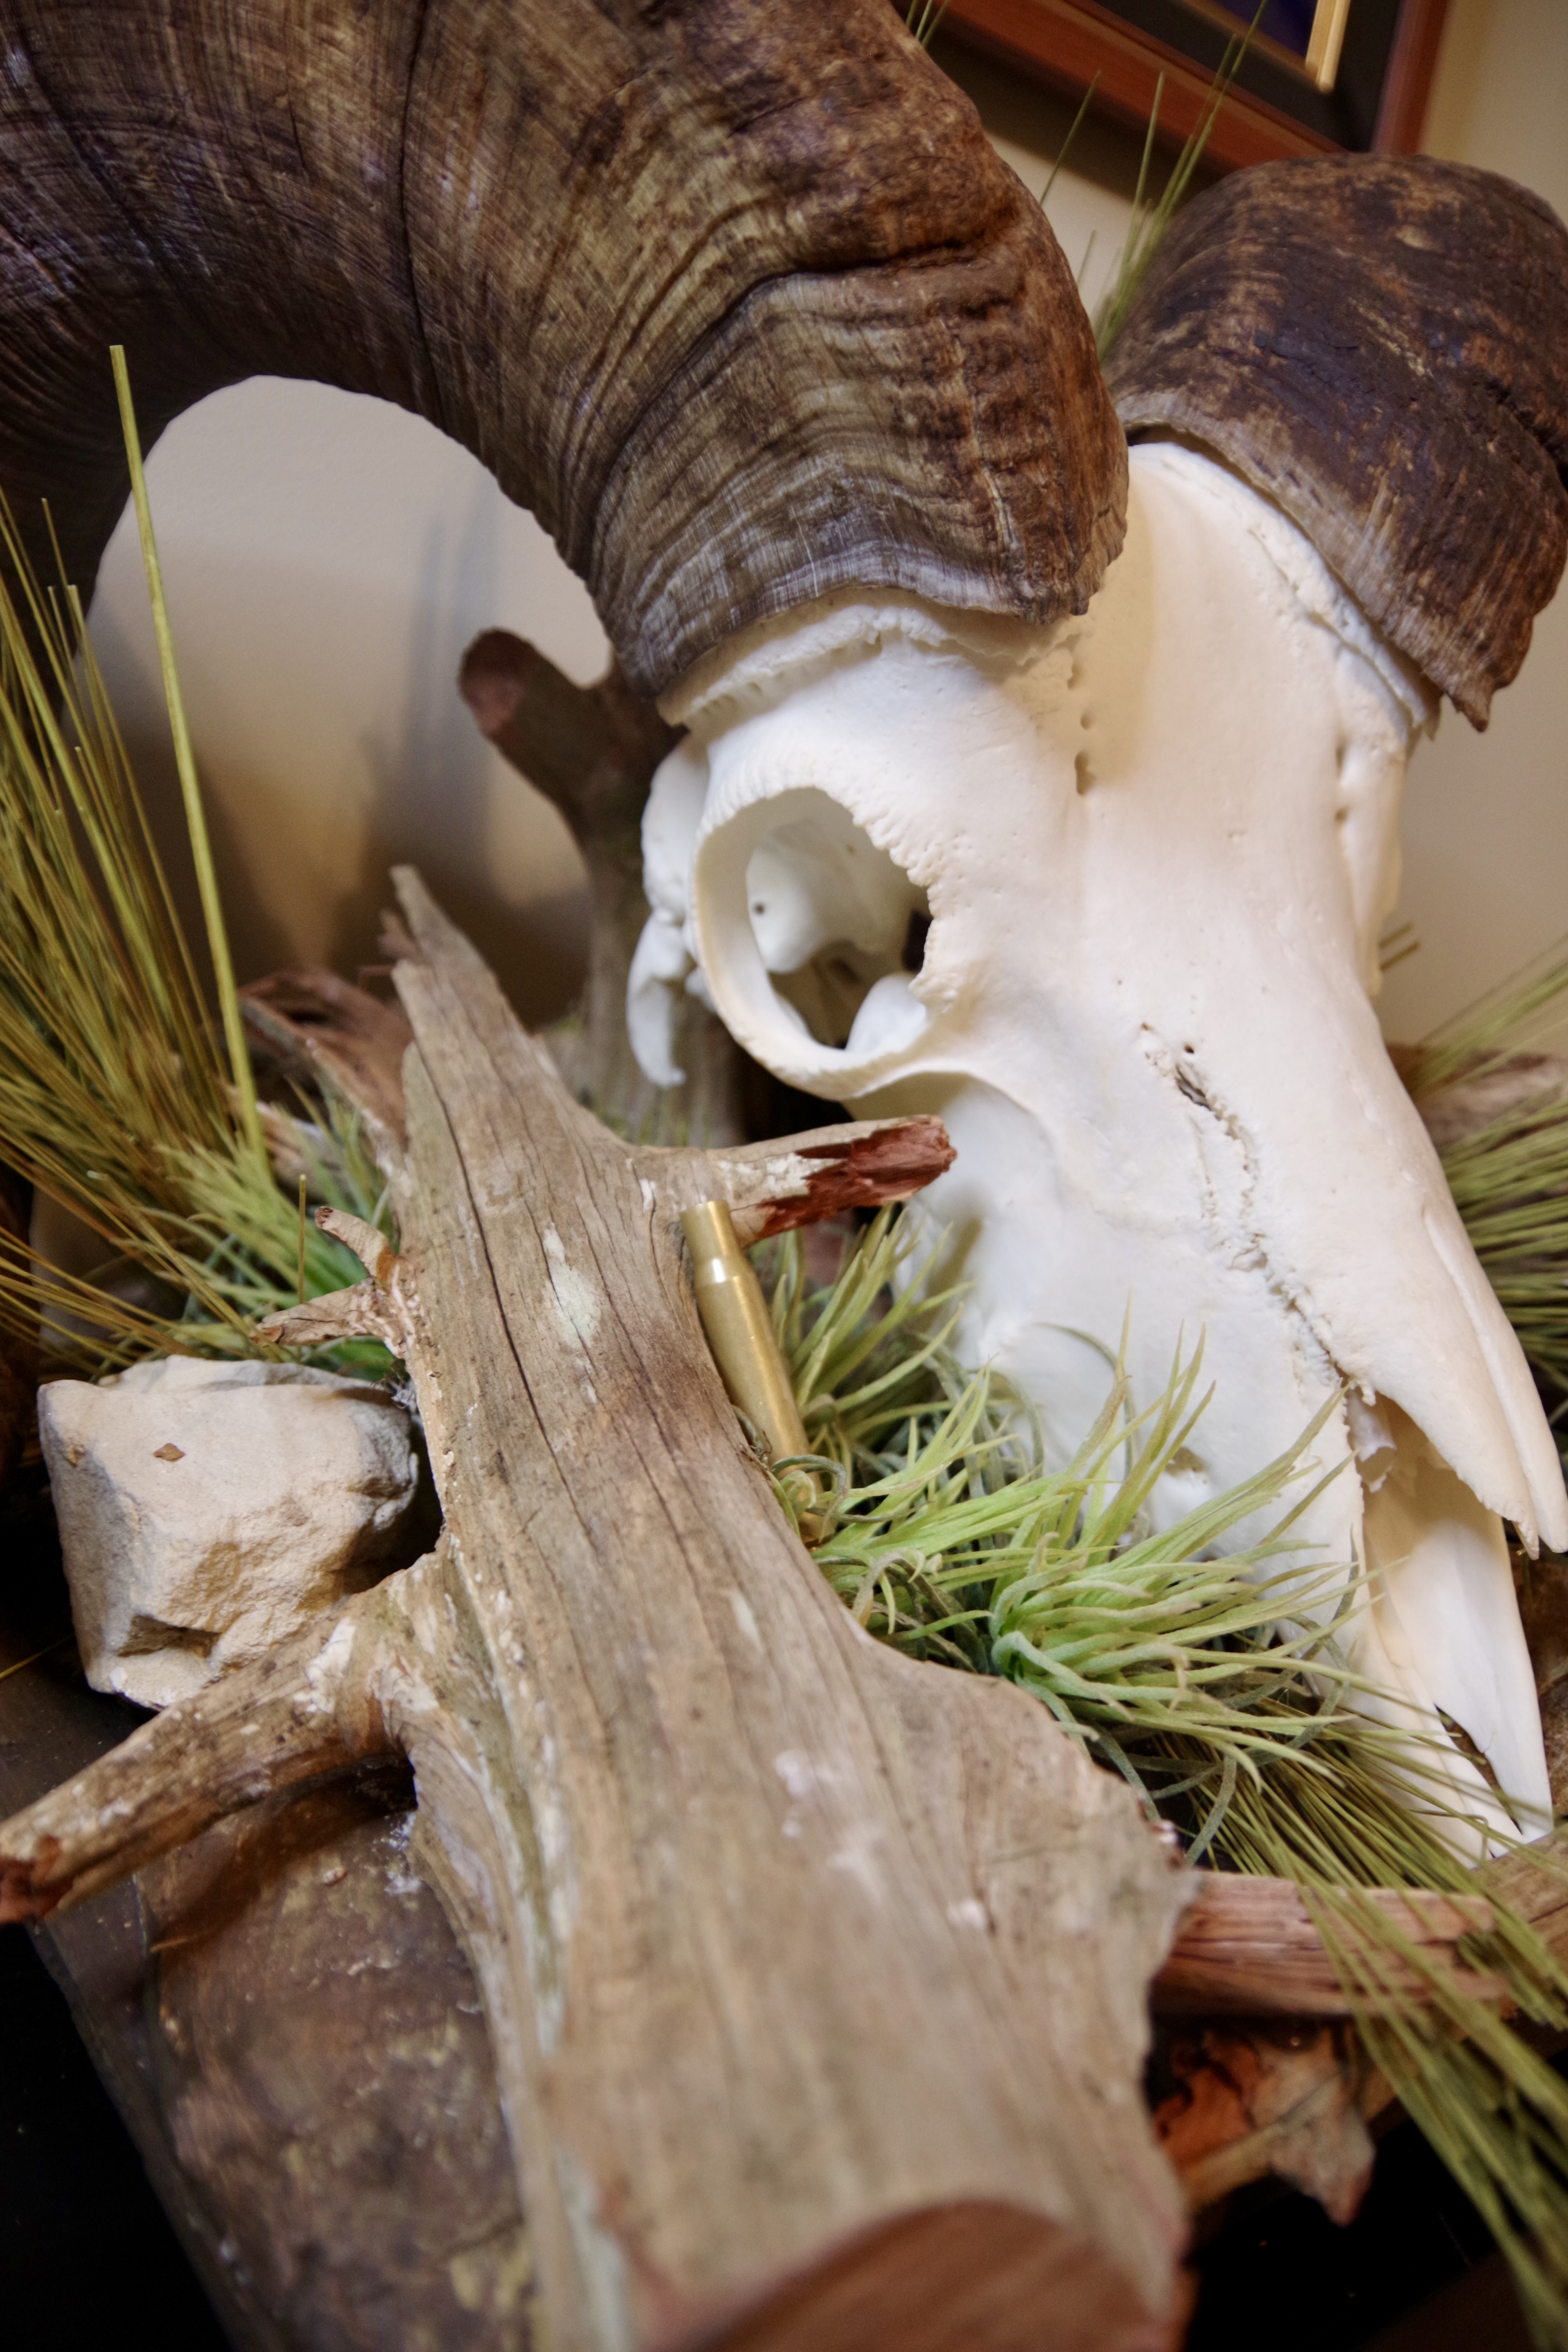
The skull itself is held by two pieces. An upright “trunk” secured to the base features an angled bracket that hooks into the back of the skull where the brainstem would be. A stick lays opposite that and parallel to the edge. The nose is wedged under this to keep the skull from rocking to the side. All other sticks and a few rocks are positioned around and under the skull to give the effect of a dead head sitting on top of the pile. Grass from McKenzie Taxidermy that resembles the vegetation where he lived fills in the space and completes the look.
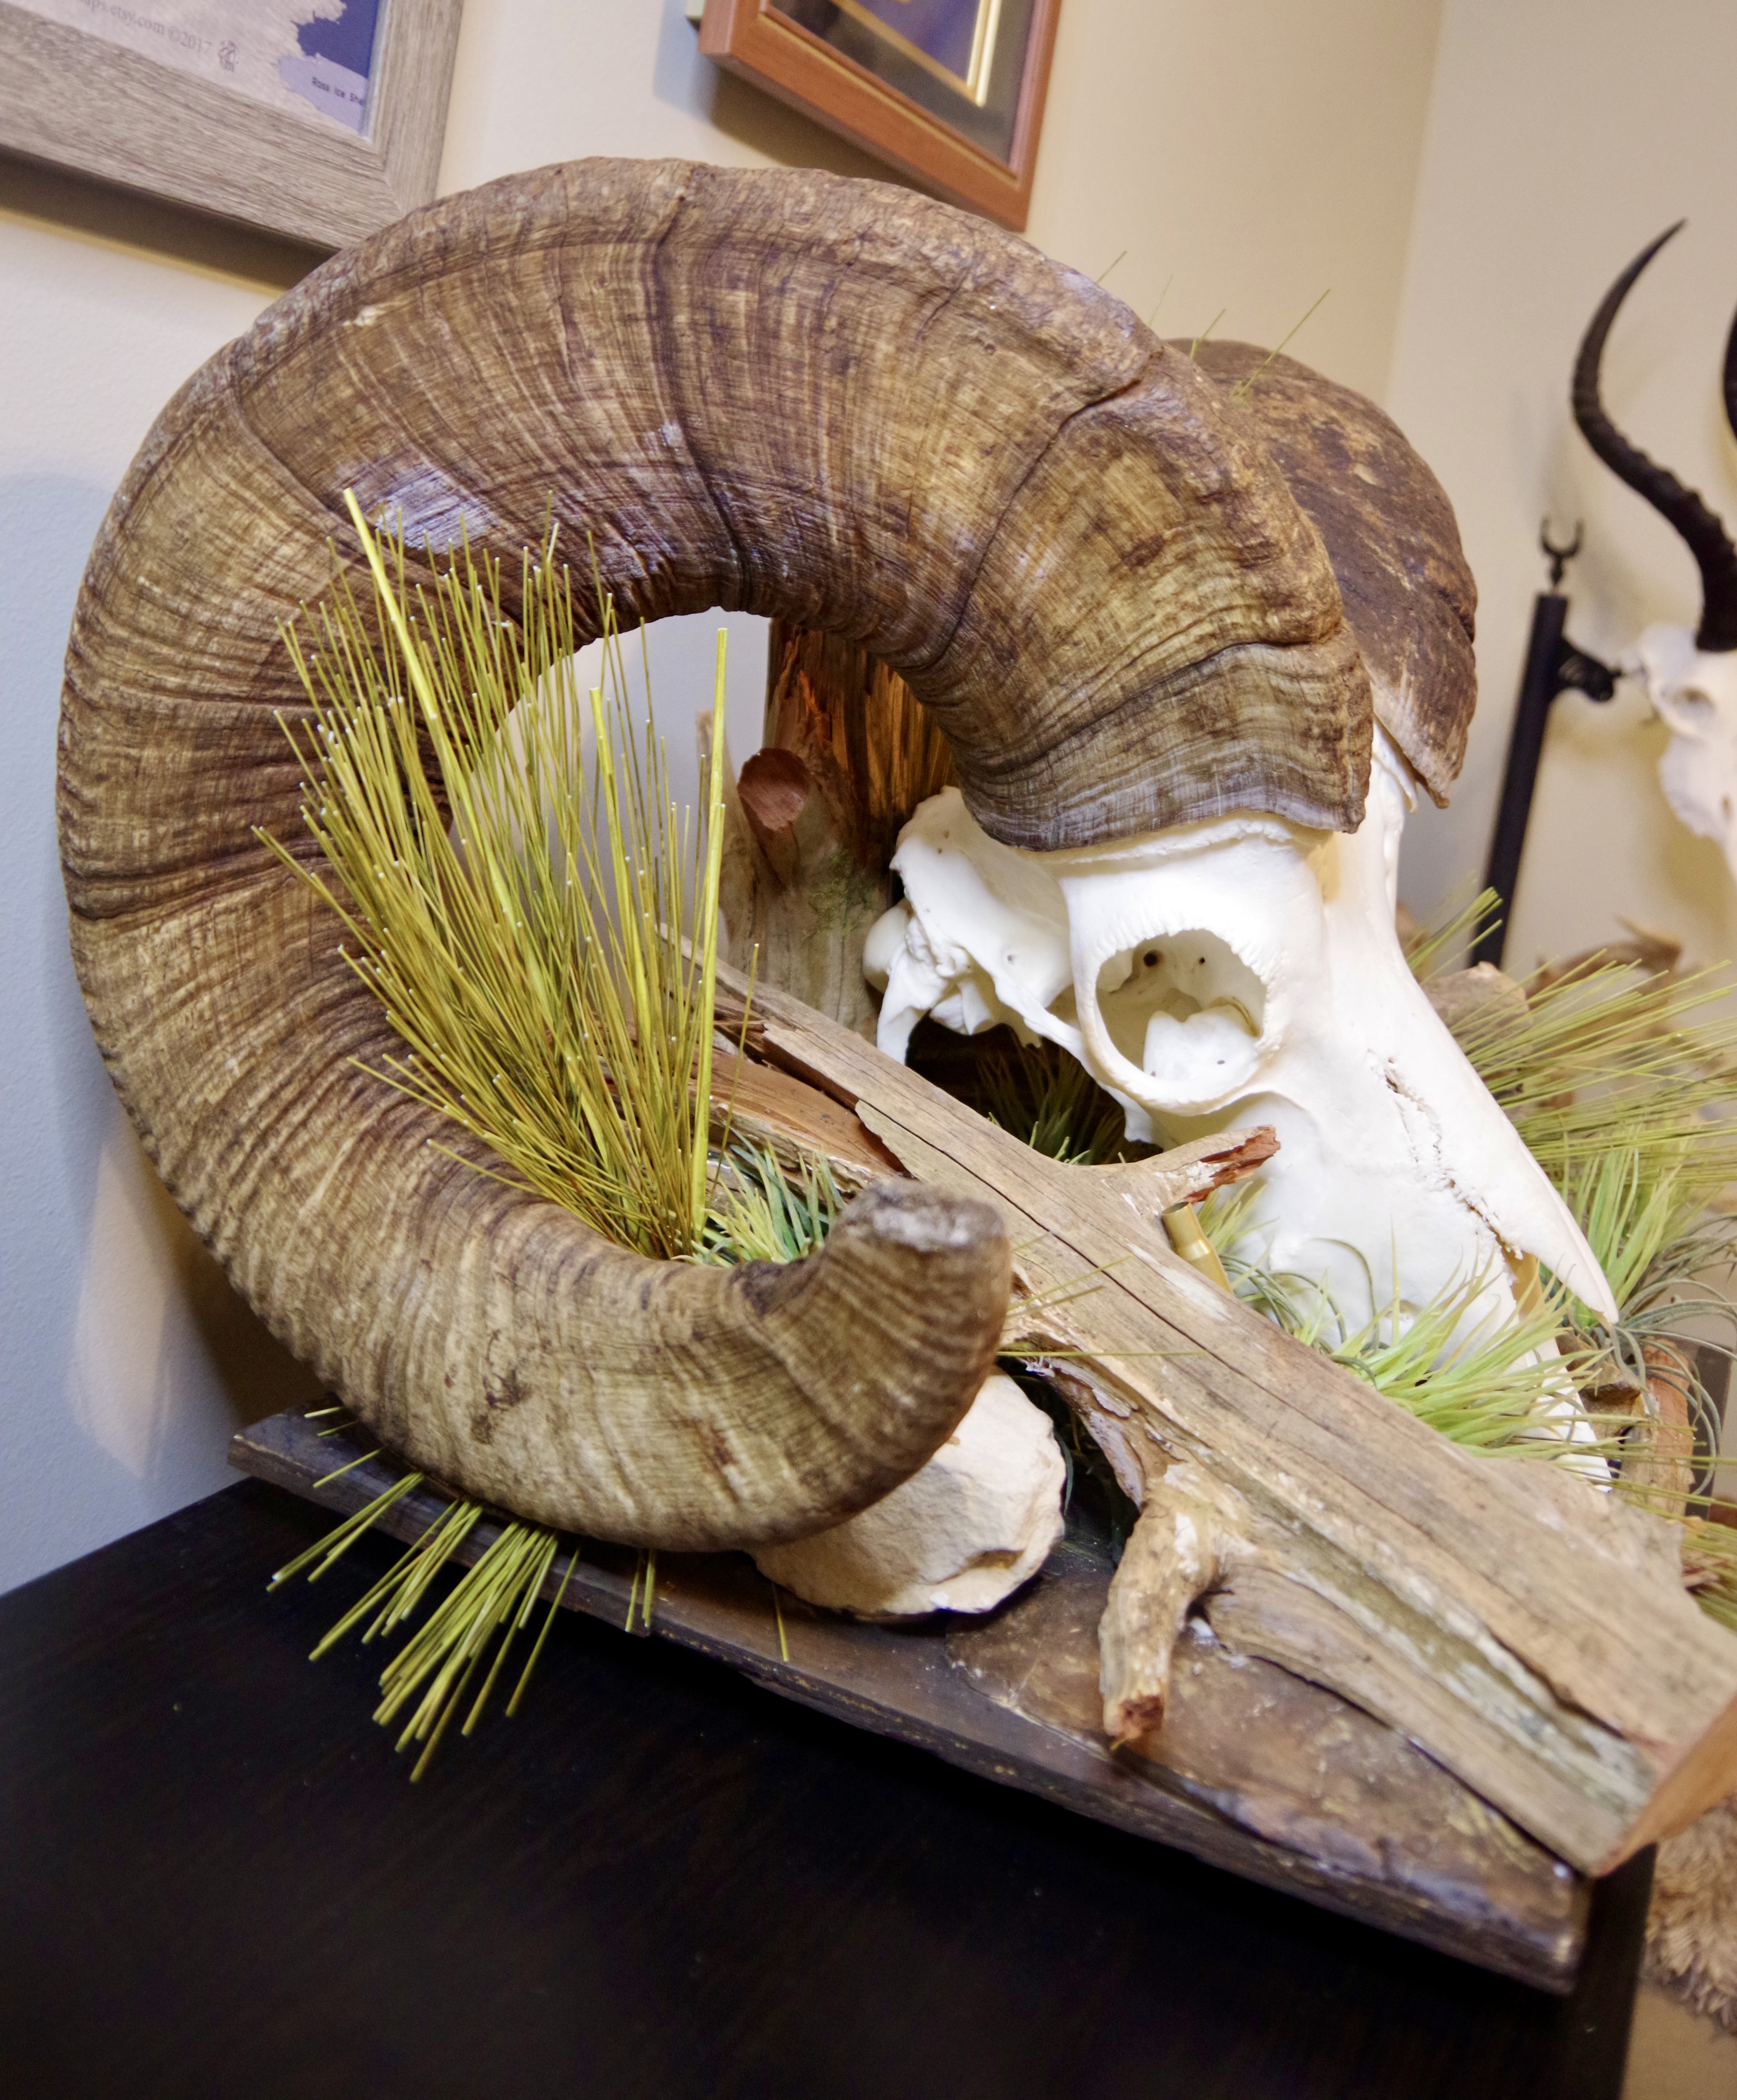
Final touch… the shell casing from the shot that felled him sits next to the ram.
Conclusion
This was an extremely rewarding project and totally worth the time and effort involved. I misplaced one tooth but all of the bones, including the sinuses and small bones I had never seen before, are still there. I can remove the skull for transport or just to hold and appreciate the weight. The whole piece is small enough to fit on a coffee table or on top of an entertainment center. Doing your own skull mount is a rewarding experience that allows you to squeeze more out of every single hunt.