When we got our chickens back in October we somewhat foolishly didn’t realize that we were getting a straight run (unsexed). As it turns out, half of them were male. Ever since, we’ve been figuring out how to attain a better male-to-female ratio. We decided to build a second large coop to enable us to split the flock up and give each bird more space. It just so happened that my parents’ neighbor had a pile of rough milled planks that he gave us along with some tin. I took the opportunity to try a different design for a more user-friendly coop than the A-frame. In this article, I’ll go through my thought process.
Coop Construction
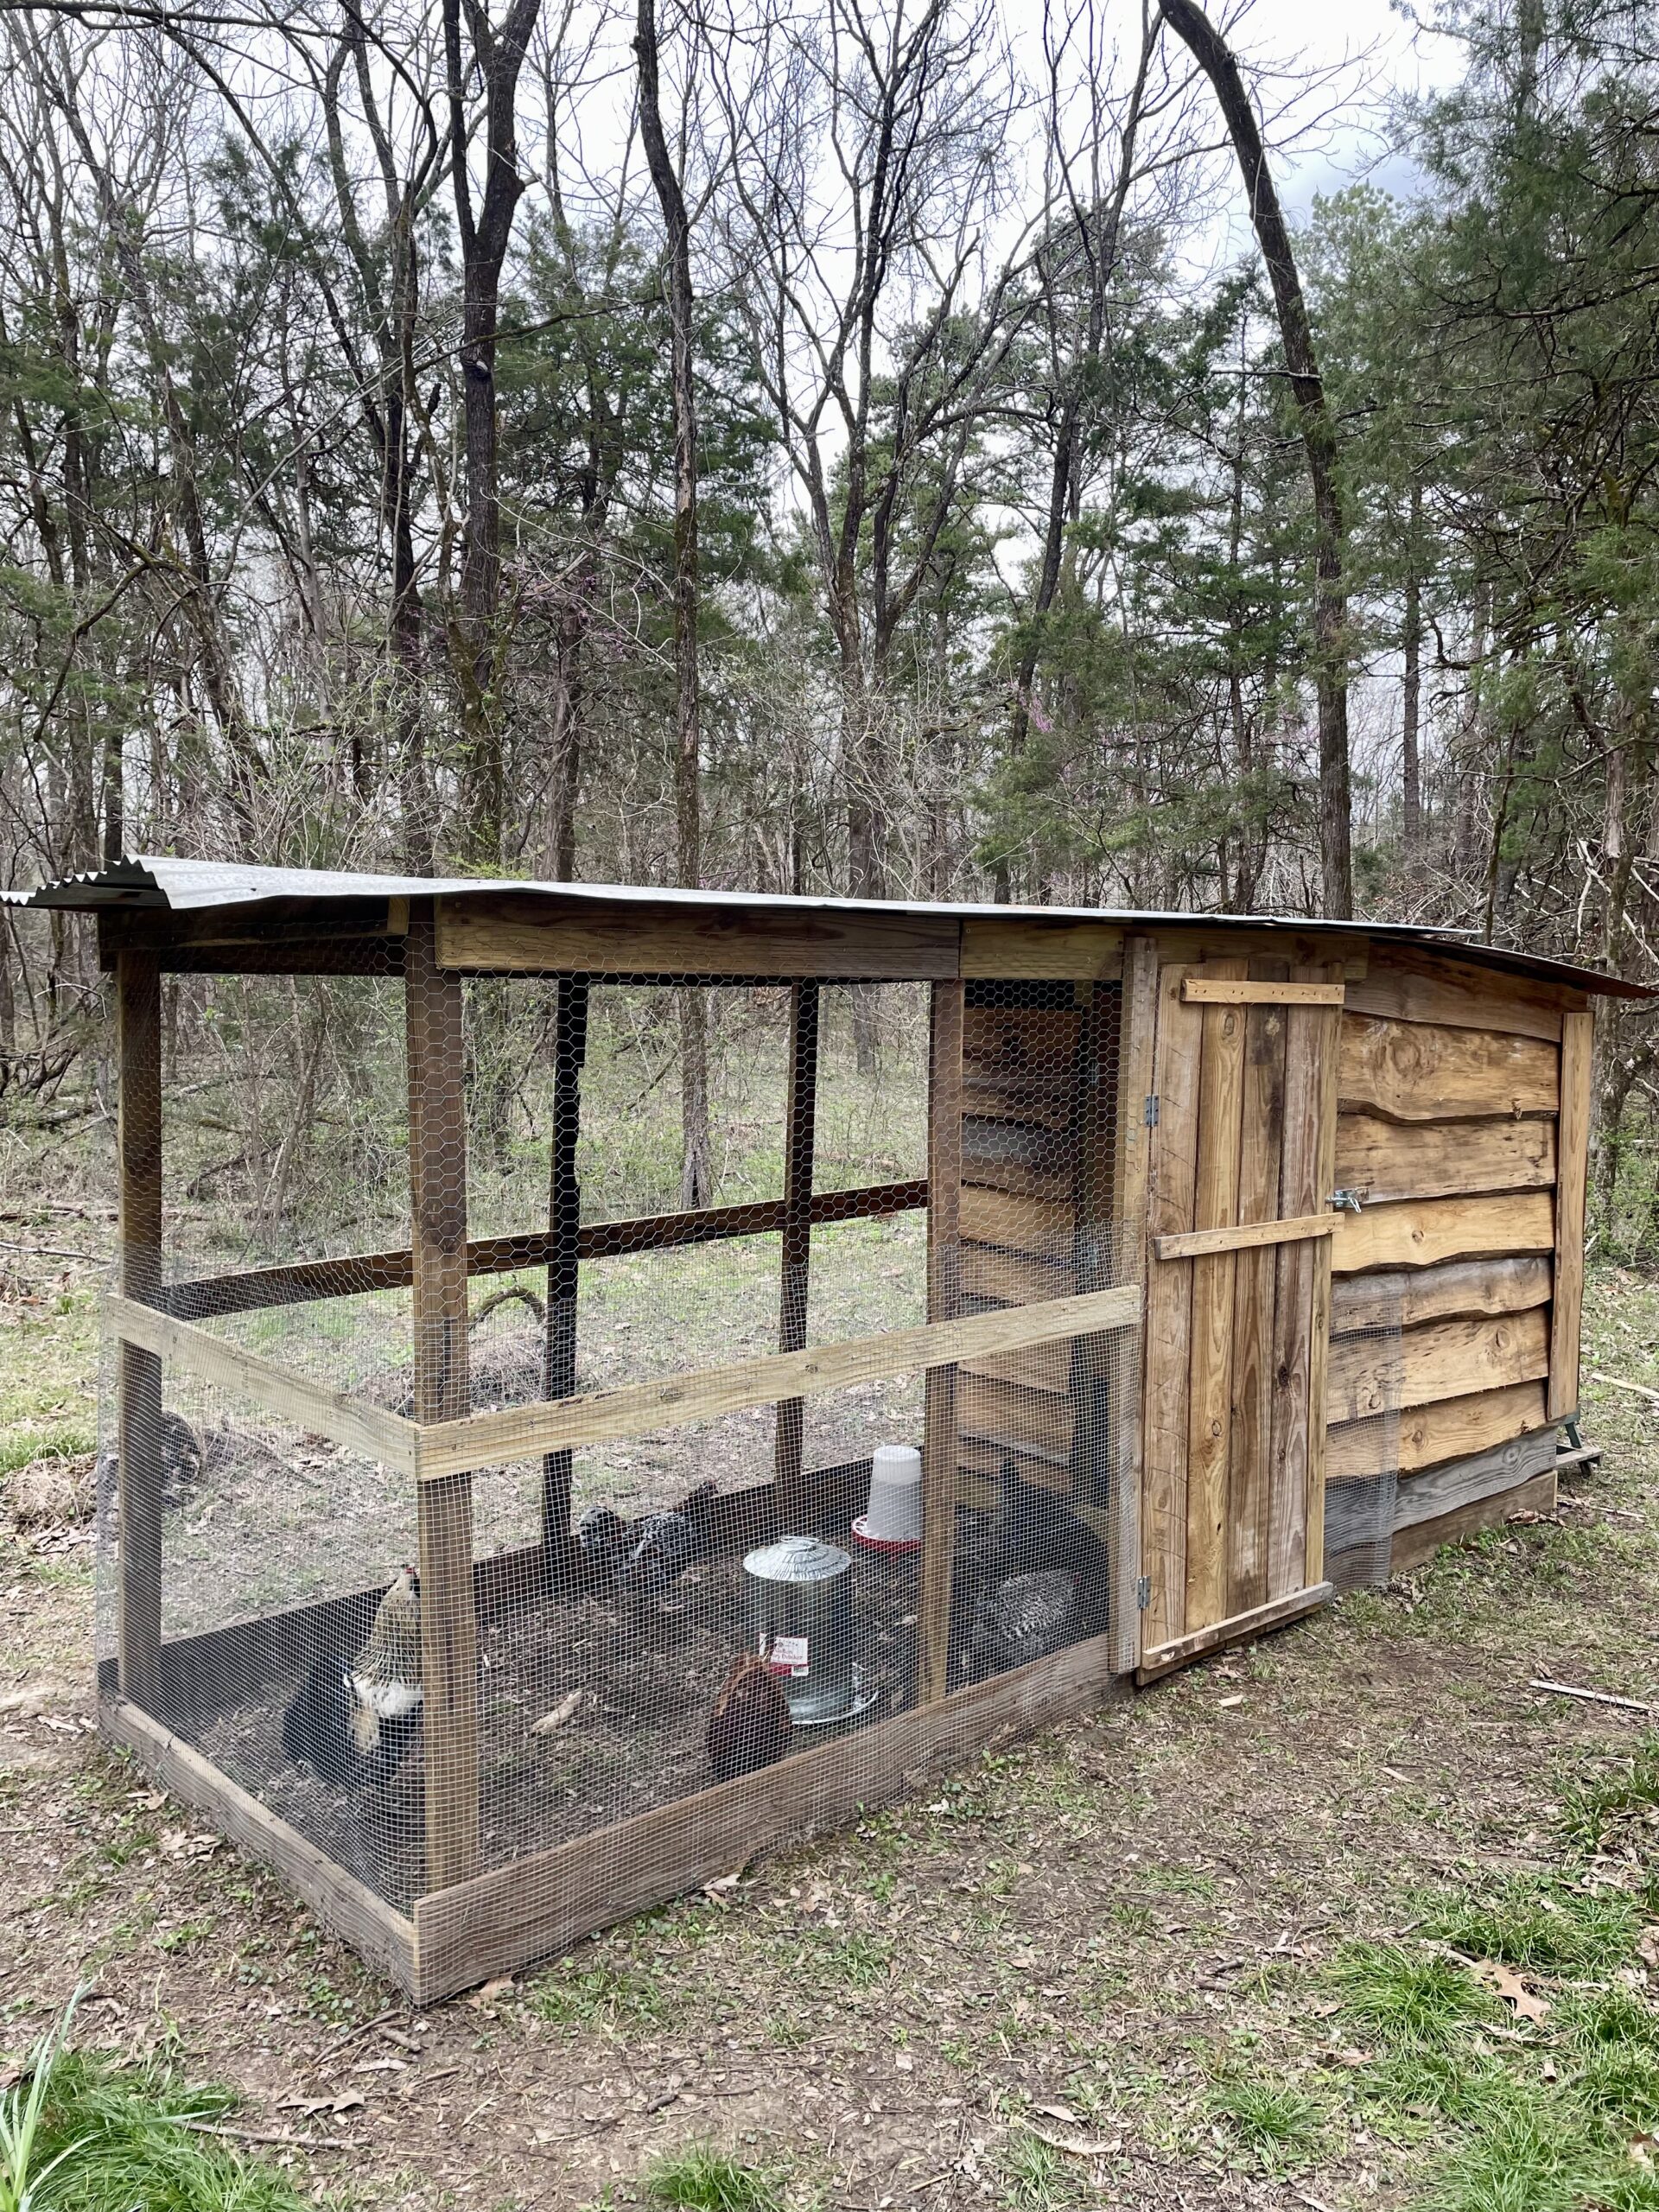
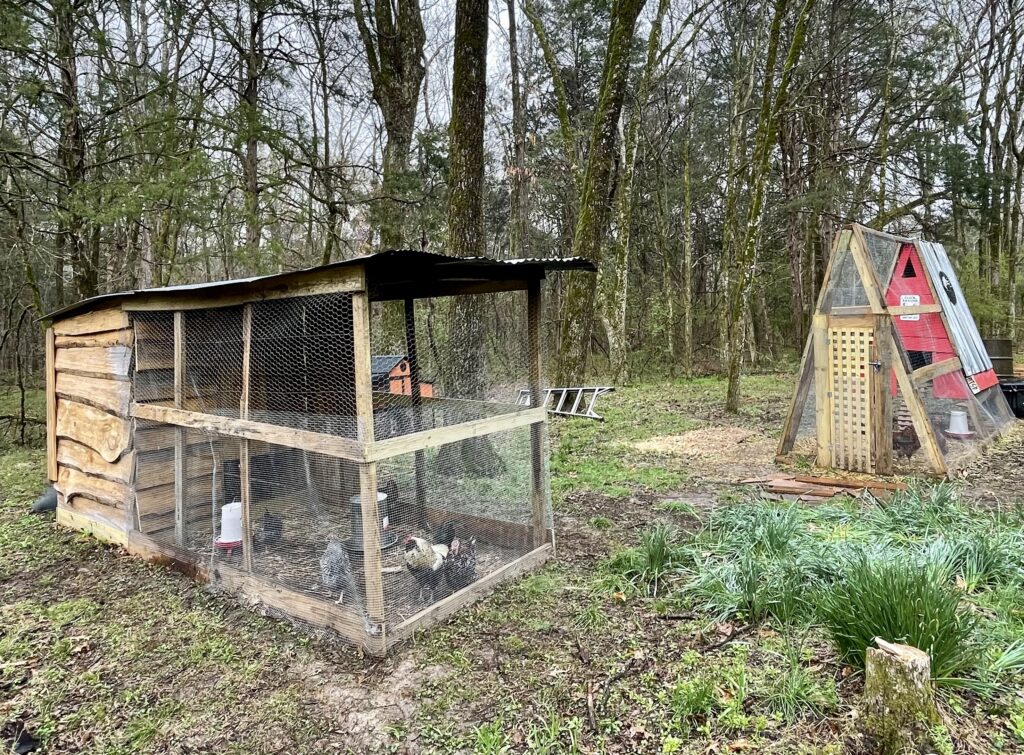
One issue I have with my A-frame is that the access door for the run is rather small. Making it big enough to comfortably walk through would have meant a gargantuan structure. I wanted this next coop to be easier for a human to get in and walk around while being roughly the same footprint. The easiest solution was a traditional, straight-sided structure.
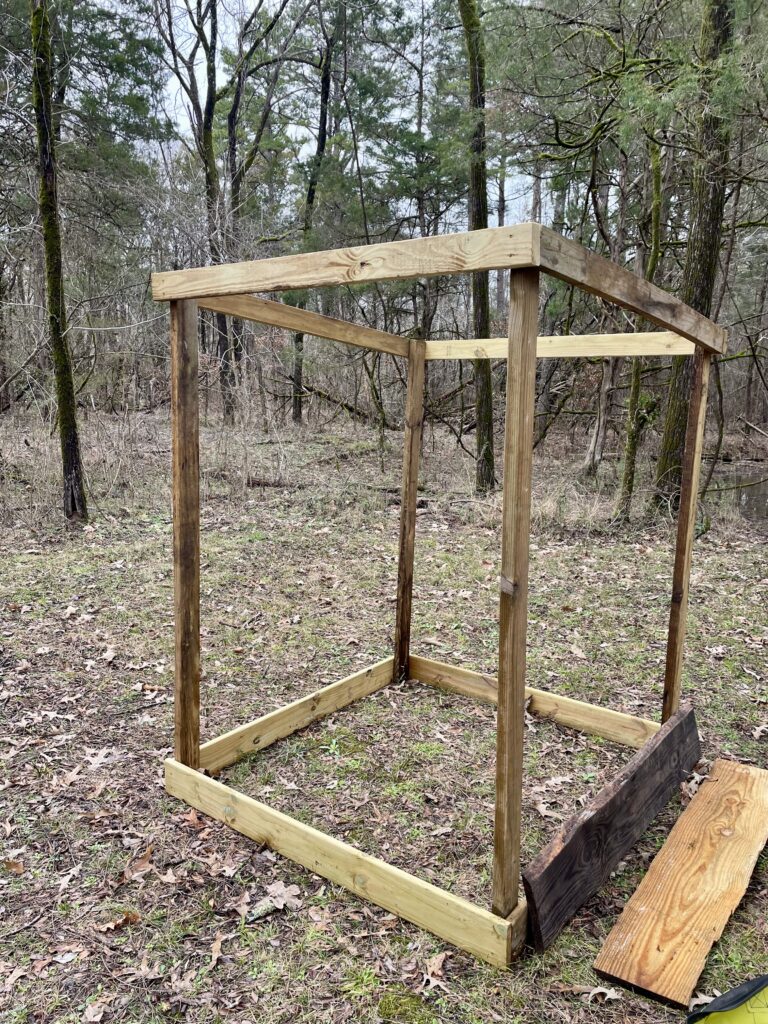
I started by building a simple frame roughly five feet square and six feet tall on the back end. The front is about six inches higher. This creates a sloped effect to allow rain to run off the backside.
Then I started on the siding. The milled planks were a natural path forward. After cutting them to length, I started screwing them in from the bottom up making sure to overlap the top one on the bottom one. This minimized gaps and ensured that rain would run down and not inside. I did three sides in this method.
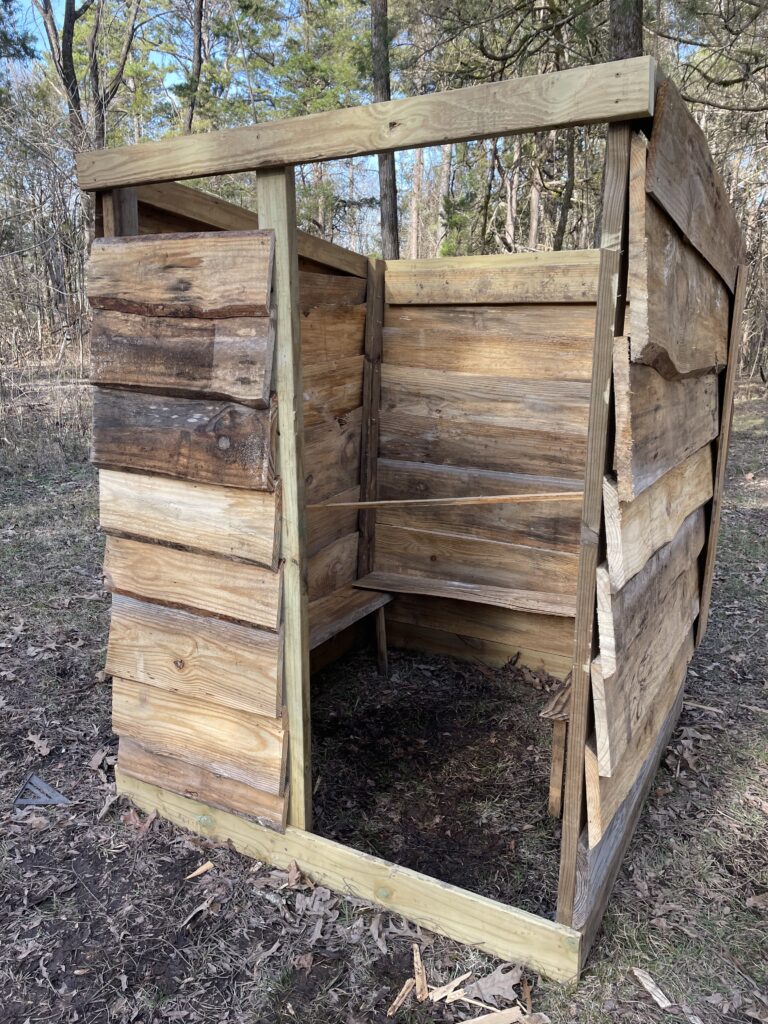
The front side I split with a piece of lumber leaving one side wide enough to easily walk through. This was to be my door while I walled the other side in the same method as the other three only with shorter pieces. The corners were closed up by planks.
On the inside, I built simple benches and a roost stick. I opted to forego nesting boxes entirely and allow the chickens to make their own.
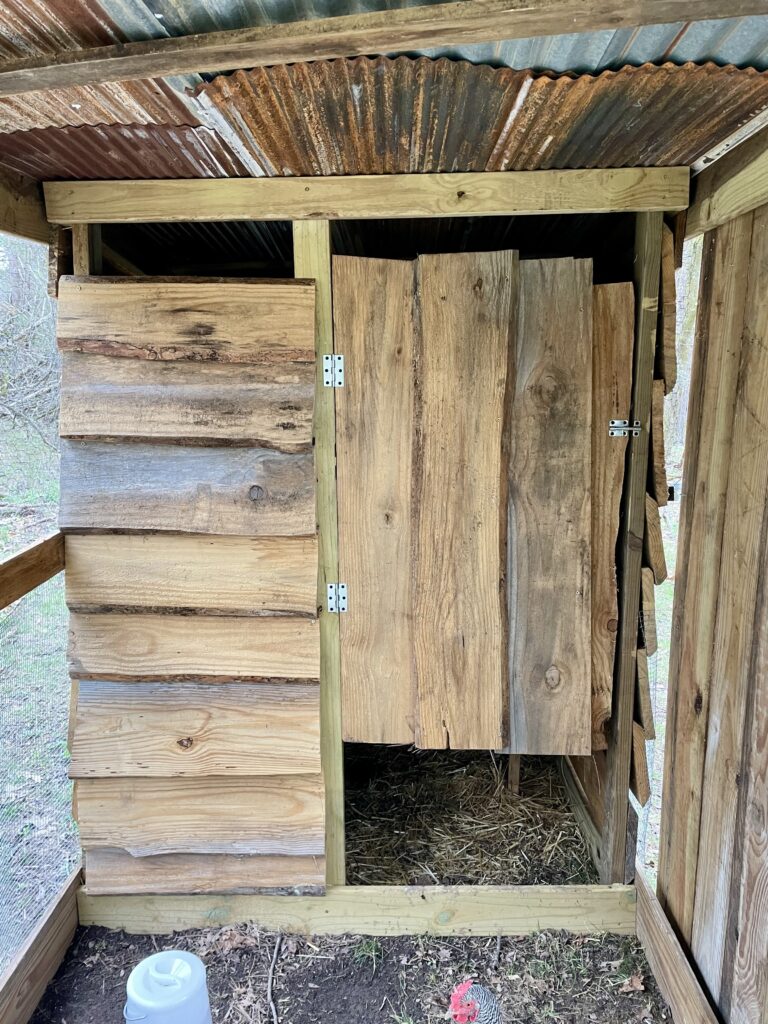
With the coop built, I framed the run with treated lumber. Again, I left space for an outside door. Using the same mesh and chicken wire from the A-frame, I enclosed the run and started on the doors.

Both were simple designs. The outer door is full length with a gate latch while the inner door is about two-thirds length with a turn bolt latch. Finally, the entire structure was roofed with tin.
Competing Designs
The A-frame and the traditional both have their advantages and disadvantages. Here are my takeaways after completing both projects:
Resource efficiency: The A-frame certainly took less material overall to build because it has one less side than the traditional. However, all of the material for the traditional was donated while I had to buy several pieces for the A-frame. So the second coop actually came out cheaper. Using whatever you have on hand may dictate design, but if you were forced to buy all material, the A-frame would get my vote for this category.
Visual appeal: This is entirely personal. I really like the visual of the A-frame shape and I think it is quite an eye catching design. However, the overlapping texture of my traditional ending up being very visually appealing and I think that makes it my wife’s preferred design.
Simplicity of build: I did not follow plans for either project. This resulting in a few instances of guerilla carpentry. However, the traditional had much fewer complications. We’re all used to seeing buildings like this so they are pretty intuitive. The A-frame requires a little more measuring and the angles complicate things. Being off by an inch or two is much more likely to have a ripple effect through the rest of the structure.
Usability: This is somewhat related to simplicity. The sloped sides of the A-frame mean that access is limited to a barely-able-to-fit-an-adult-human door on the end or small doors around the outside just big enough to reach in and grab eggs or toss new bedding. The flat sides of the traditional allow for full-length doorways. I can walk in upright and have plenty of room to gather eggs, fill food and water, replace bedding, etc.
Ultimately, coop design comes down to personal preference. If you happen to have a source for free or cheap materials it’s often best to use a design that best incorporates those materials. If you are forced to buy most or all, your design should lean toward an economical use of those materials. As long as the structure provides shelter and security for the birds and some level of access for you, it doesn’t really matter what shape it is.
Balancing The Flock
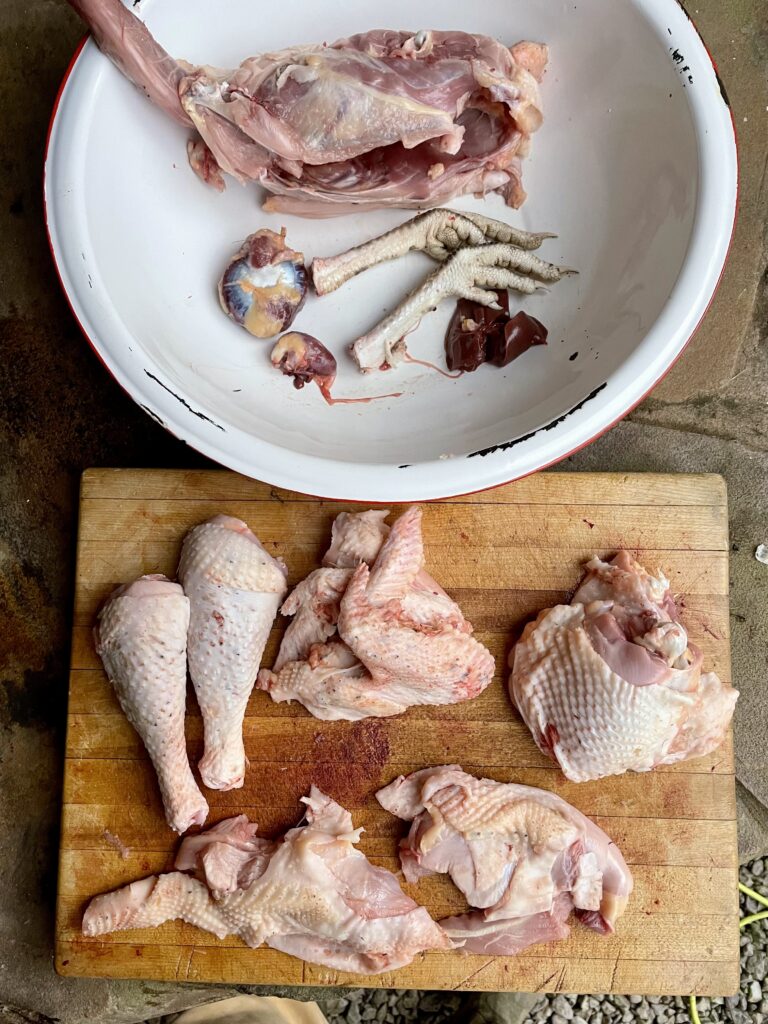
Having the proper amount of hens to roosters is important in keeping flock conflict to a minimum. The ratio we settled on was four hens to every rooster. We didn’t have time to raise a new set of chicks so we searched for some started pullets. These can be difficult to find sometimes but we located a farm about an hour north that sold them for $25-$30 apiece. This meant that with our current roosters, we needed something like 17 more birds. Prohibitively expensive. Some of the roosters had to go. We gave one away and I slaughtered and butchered two for meat.
Moving one rooster in with his own hen in the original store bought coop meant that we could get away with three more hens. We could also separate the remaining two roosters into their own coops. After some initial pecking and fighting, it seems to have worked and the new hens started laying within a couple of days.